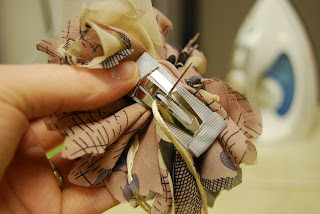
Here is a closer look at the stitching.
Wednesday, January 19, 2011
Decorative Owl Pillow
This was a simple project, I like the way it came out and I plan on making some more for my upcoming Etsy shop. This one I made for Sarah. She was one of my five craft it forward people. She requested something owl themed. This is what I came up with. I am glad she made an owl request because I love making owls!
Tuesday, January 11, 2011
Flower Pom Pom Hair clips
You Will Need:
A pattern in the shape of a flower
Organza fabric
coordinating embroidery floss
1/2 inch thick ribbon
hair barrettes
needle
scissors
pins
hot glue
Step One: Make you flower pattern. I used a CD to make the outside circle (see picture below). Cut out your pattern. Fold your fabric over in order to get 10-12 layers. Pin the patter to the folded layers of fabric and cut around your pattern.
Step Two: Cover your barrette with the ribbon using hot glue. Thread your needle with your embroidery floss. Take each individual organza flower and fold it in half three times. Run the needle through the bottom of the folded flower. Continue with the rest of the flowers alternating to the left, center, and right.
Step Three: Once you have all the flowers on pull the needle and thread all the way through and pull tight. Run back through the opposite direction. Then sew to your barrette.
Since this clip looks like a messy flower It looks great with a messy hair style. Try a low messy side bun.
Monday, January 10, 2011
Cute and Simple Tote Bag
I have been wanting to make a new bag, something cute and simple that I can toss stuff in and go to the store, to social gatherings, the beach, practically anywhere. My purse usually doubles as my diaper bag because it is to much of a hassle to carry around two separate bags. I love the way this bag turned out and I whipped it up in hardly no time at all.
Step one: Press your fabric and cut out all your pieces. This bag was totally free handed I had no pattern I just cut the fabric a little bigger than I wanted the bag to be (In the shape of a rectangle, same for the liner). Cut long strips for the ruffles and a strip for the strap.
Step two: Take the front side of the bag and divide it into three equal sections and cut. Then make your ruffles. (Tip. Set the tension on your machine to the highest setting and the longest stitch setting.) This will ruffle the fabric for you, and save a lot of time.
Step three: Pin the ruffle to the inside of two of your front panels and sew. Repeat on the other side. Then line up the front side and the back side together fold in half and cut off the bottom corners in a curve. With right sides together pin and sew. (I added pleats to the front and back of the bag to make it a little more narrow at the top.) Turn your bag right side out and press your pleats and seams on the bag. Lay the bag on top of your liner fabric. Cut the liner fabric to the new shape of the bag. With right sides together hem the liner fabric and insert into the bag.
Step four: Make your strap. Fold the outside and the liner fabric to the inside of the bag and pin going all the way around and inserting the strap on each end. Sew all the way around and you are done.
Saturday, January 1, 2011
Ring in the new year with some cute ear wamers.
The cutest way to warm your ears this season!
I recently came across this new craft blog called Prudent Baby and found the tutorial for this ear warmer there. I love her blog! She has given me a lot of cute ideas and inspirations. So go check it out.
I recently came across this new craft blog called Prudent Baby and found the tutorial for this ear warmer there. I love her blog! She has given me a lot of cute ideas and inspirations. So go check it out.
Subscribe to:
Posts (Atom)


